ADCOLE CORPORATION unveiled an automatic camshaft and crankshaft surface finish gauge for the plant floor that has been upgraded with a new Siemens motion control system, in response to broader global acceptance.
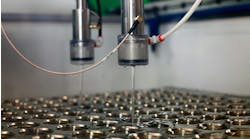
The Model 1000 surface finish gauge performs automatic and repeatable surface measurements on the factory floor, and has been improved with a Siemens Sinamics motion control system to ensure optimal customer support. Using pushbutton control, an operator can load a part, press one button to start, and have all surface measurements, such as Ra, Rp, Tp, and Rsk performed in one sequence on main and rod journals and thrust faces.
Built on a solid platform of structural steel and granite, the Adcole Model 1000 surface finish gauge uses three stylus tips that are capable of scanning 2,000 points per nm. Users can perform gauge repeatability and reproducibility (GR&B) tests, prove machine capability, and qualify produc-tion equipment such as automatic polishers. Average cycle time is six minutes and statistical data is maintained using Q-DAS and qs-STAT.


