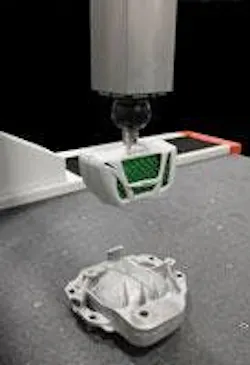
Green Laser Coordinate Measuring Machine
For more than 20 years Perceptron has pioneered the use of laser scanners on portable and fixed coordinate measuring machines. With the fast-growing application of 3D laser scanning for reverse engineering, production-part dimensional inspection, and as a compliment to 3D printing, Perceptron has introduced the world’s first green laser-line metrology scanner. Highly reflective materials such as machined aluminum and carbon fiber composites have always been a challenge for laser scanners, requiring part spraying with a powder coat, which severely inhibits its practical use on repetitive production parts. The new generation of ScanR CMM Laser Scanner represents a technological breakthrough solving many of the age-old application problems associated with laser scanning. ScanR is seamlessly integrated into Perceptron’s TouchDMIS™ metrology software, offering a simple one-touch scanning interface and allowing initial user set-up using tactile-probe with subsequent sharing of the generated part coordinate system. Feature extraction from the generated point cloud allows automatic inspection of part features against nominal feature definitions selected from CAD. Production parts can be programmed to be inspected automatically with scanning zone and parameters adjusted per feature for data acquisition and cycle time optimization.
Features:
- Enhanced dynamic range (Wider coverage of color spectrum and reflectivity)
- Improved material coverage (Carbon fiber, polished metal, plated metal)
- Increased accuracy (Thinner laser line with higher signal to noise ratio)
- Improved edge detection (Sub-pixel optimization)
- Adjustable data acquisition rate for HQ (high quality) and HS (high speed) operation
- Large field of view and depth of view
- Universal adaptability for any brand of CMM or PCMM
- Laser and electronics package fully contained in the scanner head
