Metrology Service Provider Doubles Throughput With CMM
Contract inspection and reverse engineering capacity have doubled in terms of throughput, while the size of the component that can be measured has increased more than five-fold at Laser Scanning Ltd, based in Chapeltown, near Sheffield. It follows the installation of a second, larger coordinate measuring machine (CMM) built by LK Metrology at its Castle Donington factory.
The latest LK 20.12.10 ceramic-bridge CMM with 2,000 x 1,200 x 1,000 mm working volume has joined a smaller 8.7.6 model. When Laser Scanning's managing director Johnathan Rigby started the company in September 2016, he brought the original machine with him from his previous employer, PMS Diecasting, Rotherham. This firm now subcontracts much of its metrology requirement to Laser Scanning, both firms are members of the Glide Group, along with plastic injection molding specialist Loadhog, toolmaker GoTools, and wire joining and tensioning product manufacturer Gripple.
As the inspection provider's name implies, most data acquisition is by laser scanning on both LK CMMs as well as on two articulated arms supplied by Nikon Metrology. All the equipment is housed in a temperature-controlled room held at 20 ± 1°C in the Chapeltown facility. Parts delivered for inspection are acclimatized in the same room for 24 hours to reduce measurement uncertainty.
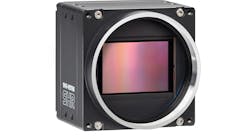
Three types of non-contact sensors from Nikon Metrology are in use on the CMMs: an XC65D cross scanner and line scanner models L100 and LC15Dx, which respectively have 13.0, 6.5 and 1.8 µm measuring accuracy. The latter provides performance equivalent to tactile probing, which is also utilized by Mr. Rigby and his team for capturing physical dimensions, such as hole diameters, using a TP20 touch probe and an SP20 scanning probe, both from Renishaw. A changing rack mounted on the CMM table allows automatic sensor exchange within an inspection cycle.
What prompted the purchase of the larger CMM was Mr. Rigby's receipt from JCB Power Systems in Derby of a contract to assist with quality control (QC) of cylinder blocks and heads for the engines that power the OEM's off-road vehicles. JCB has its own LK machine equipped with a touch probe that serves the production line in Derby. Laser Scanning assists by providing measurement and inspection of goods-in to the plant, where it has a QC engineer permanently stationed.
Additionally, the Chapeltown center helps with preparing CMM programs and proving them out, as well as inspecting prototypes to support JCB's research and development department. Especially for the latter purpose, the service provider can furnish much more comprehensive and accurate information about a new component than is possible using touch probing techniques at JCB Power Systems.
Although the engine plant does have laser scanning capability on an articulated arm, the level of detail that can be acquired is less, as its scanning resolution is 23 µm, much lower than the best CMM-mounted scanner in use at Laser Scanning’s offices in Chapeltown. In any case, inspection using an arm would be a manual process and almost impossible to replicate on subsequent occasions, whereas running a program on a CMM is automated and highly repeatable.
Mr. Rigby explains, "By working with JCB's Inspection department and R&D team, we have been able to free up our customer's machine to concentrate on production QC. They also appreciate the greater detail we can provide about new prototypes, as laser scanning allows us to show them the form of a component as well as supply measurement data. For example, they recently asked us to help them with a new rocker cover housing that had been plastic injection molded to determine whether the gasket area was within tolerance after shrinkage in the manufacturing process. Inspecting a planar surface such as the gasket area by touch probing at multiple points would not give an overall idea of its flatness and in all probability, if the exercise were repeated the results would be different.’
"In contrast, Rigby adds, “Scanning generates millions of points to give a detailed 3D picture of the entire surface to a very high level of precision and the deviations can be quantified. It enables JCB to show its mold tool supplier exactly where any inaccuracies are."
The Chapeltown metrology company is ideally placed to help any manufacturer that uses LK measuring machines and software, as work and programs can be transferred seamlessly to run on either CMM. Projects have involved a tier-2 supplier in the Midlands to the global aerospace industry, which used Laser Scanning's subcontract services for inspecting components while their own machine was out of action; and a medical equipment manufacturer that wanted to verify its in-house QC capability.
About half of Laser Scanning's turnover is derived from reverse-engineering legacy components for which models and drawings do not exist. Machine shops and toolmakers are frequent customers and the company also provides a service to designers.
The latest version of LK CAMIO software, version 8.5, is in use at the Chapeltown facility. Featuring interoperability across CMM platforms and sensor technologies, it is designed to create efficient inspection programs for measuring geometrical features and evaluating surfaces using advanced point cloud analysis, with part-to-CAD comparison and full reporting capability.
Mr. Rigby concluded, "CAMIO software has a Microsoft Office feel to it, with a similar, customizable icon ribbon at the top of the screen. It is very user-friendly, as programming functions are easily accessible and not buried within drop-down menus. The new version interfaces with our Geomagic software from 3D Systems, allowing us to create accurate models from 3D scan data as well as use it for QC and measurement.
We regard our association with LK and Nikon as two-way partnerships, whereby they provide us with all the support we need, and we feedback information to the OEMs to assist in their development of the next generations of products."
Laser Scanning is accredited to ISO 9001 for quality management, ISO 14001 for environmental management, ISO 18001 for occupational safety and health, and ISO 27001 for data security. It is a member of the GTMA (Gauge & Toolmakers Association), Federation of Small Businesses and Employee Ownership

