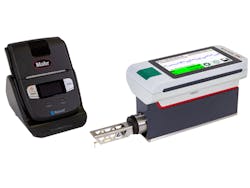
MarSurf M 410 Portable Surface Roughness Measuring Instrument
The MarSurf M 410 portable surface measurement instrument uses a skidless probe system for use in both laboratory and production environments that makes recording and evaluating measurement data easy, precise, and versatile.
It provides high precision and accuracy for surface roughness measurements on small and large workpieces and features a large, illuminated, rotatable 4.3-in. high-resolution touchscreen. The device employs the stylus method to enable high-precision testing of roughness, waviness, and primary parameters, ensuring unparalleled accuracy.
It features a wide measuring range of 500 µm (with optional 1,000 and 1,500 µm ranges) and a probe tip as fine as 2 µm, ensuring versatility for a wide variety of surface measurement tasks.
It also features a modular design, consisting of the MarSurf M 410 operating unit and the MarSurf MD 26 drive unit. These components can be easily separated and connected via a supplied USB cable, enhancing flexibility and ease of operation. The operating unit can be used in various configurations, such as on a workstation or mounted on a stand.
Furthermore, the MarSurf M 410 streamlines reporting with the ability to automatically generate measuring reports in PDF format. Users can effortlessly print these reports to letter-sized paper via Bluetooth or USB. Additionally, it offers an optional integration of a QR/barcode/data matrix code scanner, simplifying data entry and speeding up processes.
Available with an integrated connection to MarWin Easy Roughness Mobile software, the M 410 to be used as a drive unit, enabling another way to interface and control the M 410 while providing the complete functionality of the touchscreen unit on a PC. Users can fully operate the M 410, change filter settings, calculate additional parameters, and more, instead of just viewing the stored measurements. Direct connection to the PC is available via a USB cable or Bluetooth adapter.
To ensure enhanced traceability, the MarSurf M410 is equipped with the MarConnect-Duplex interface, allowing for the transmission of gage IDs with each measurement. This feature enables documentation of the measuring device used, ensuring traceability of measurement results.
It has a practical touch display, integrated PDF memory, and Bluetooth data transmission. Additionally, it includes accessories such as a mobile Bluetooth printer for profiles, MRC, ADC curve, and results, along with a mini-USB interface.
Features:
- Automatic probe positioning
- Versatile docking station
- Comprehensive interfaces
- Simple and intuitive operation: as easy as operating a smartphone
- Large TFT touch display
- Assistant-guided tilt adjustment
- Unique touch arm management
- Separation of display and drive unit
- 55 parameters
- Magnetic stylus arm mounting
- Automatic cutoff selection: ensures correct measurement results even for the non-measuring technician
- Direct printing on the mobile printer
- Data backup as TXT, X3P, CSV, and PDF file
- Creation of finished PDF protocols directly in the measuring device
- Customer-specific comments for the PDF protocol are entered directly on the MarSurf M 310
- Display and print MRK and ADK curves
- Save more than 30,000 measuring programs
- Micro-USB interface for remote control via ASCII commands, e.g. via statistical process control software
- USB-A interface for connection of USB Bluetooth adapter or printer
- Transmission of measurement protocols and data optionally via Bluetooth or cable
- IATF 16949 compliant
| Dimensions | 8 x 3 x 4 in. (198 x 77 x 97 mm) |
| IP Protection | IP40 |
| Measuring Speed | 0.004, 0.02, 0.04 in/s (0.1, 0.5, 1 mm/s) |
| Positioning Speed | 0.1 in/s (3 mm/s) |
| Measuring Principle | Tactile stylus |
| Probe | Inductive skidless |
| Measuring Units | Metric, inch |
| Measuring Range | 500 μm (±250 µm) (0.02 in (±0.01 in.)) for probe arm length 45 to 1,500 µm (±750 µm) (0.001 to 0.06 in. (±0.03 in.)) for probe arm length |
| Cutoff Ic | 0.003, 0.01, 0.03, 0.1 in. (.08, 0.25, 0.8, 2.5 mm) |
| Short Stroke | Selectable |
| Number of Sampling Length | Selectable: 1 to 16 |
| Stylus | 2, 5 µm |
| Measuring Force (N) | 0.00075 |
| Storage Capacity | 3,900 profiles, 500,000 results, 1,500 PDF logs |
| Data Interface | USBA, MarConnect (RS-232), Micro SD slot for SD/SDHC cards up to 32 GB |
| Humidity | 30 to 85%, non-condensing |
| Rechargeable Batteries | Li-Ion, 3.7V, nominal capacity 11.6 Wh |
| Power Supply | 100 to 264V |


