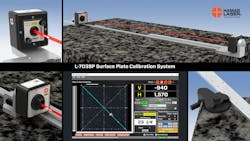
The L-703SP Surface Plate Calibration System is a compact geometry laser-based calibration system that's highly repeatable, offers high resolution and accuracy, easy setup and training, and fast data collection.
The system offers many advantages over conventional methods: It's 30 to 40% faster than electronic levels, more rugged and reliable, and more repeatable from one tech to the next. In addition, the L-703SP is set up directly on surface plates, so each line segment setup is much easier than autocollimators and laser interferometers, which require floor mounting and touchy setups. This results in faster plate calibrations and does not require re-taking data if the laser beam is broken.
Using Hamar Laser’s new L-703S Spindle and Straightness Laser and T-1297 3-Axis Wireless Straightness Target, the laser is ideal for high-resolution straightness applications, such as surface plates, machine-tool guideways, and spindle axes. The T-1297 target features a super-linear, 2-axis PSD (Position-Sensitive Detector) with a resolution of 10 μin. (0.25 μm) and mechanical repeatability of ±10 μin. (±0.25 μm).
It features Windows-based Plane6 Surface Plate Calibration Software, which offers an easy-to-follow, 3-step calibration procedure and built-in tolerance table that speeds setup and data-taking and generates a full-color report. It also includes the A-703SP-LM Laser Mounting Fixture, A-703SP-SE Straight Edge & Ruler, A-1297-SP High-Accuracy Flatness-Measuring Base, and A-703SP-SE-CLT Corner and Mid-Point Locating Tool.
For resurfacing surface plates, the L-703SP also features the Lapping Spot-Checker, a unique time-saving feature allowing users to spot-check the flatness of any line segment in the Moody plot without having to take data for the entire plate. This can save many hours when having to lap in a plate that is out of calibration.
In addition to surface plate calibration and flatness, the L-703SP System measures surface vertical and horizontal straightness, axis vertical and horizontal straightness, and guideway vertical and horizontal straightness.
The laser and target are powered by Li-Ion rechargeable batteries with 14+ hours of life and use Bluetooth wireless communication.
Features:
- Small, compact, and lightweight.
- Plane6 Software speeds up the calibration process.
- Geometry laser, not an interferometer, and much easier to use.
- Resolution of 10 µin. (0.25 µm).
- Target measuring base has ±10 µin. (±0.25 µm) mechanical repeatability.
- Easy & fast setup that does not require the plate to be earth level.
- T-1297 3-Axis Wireless Straightness Target with a resolution of 10 µin. (0.25 µm), 2-axis, super-linear PSD sensor, Bluetooth communication, and a Li-Ion rechargeable battery with 14+ hours of life.
- Built-in straight edge and dimension scale.
- Plane6 Software features a 3-step procedure that guides you through the process making the system easier to learn.
- Can be used to spot-check measurement lines when re-lapping a plate that is out of spec. It only takes 2 to 3 minutes to spot-check a line.
Hamar Laser Instruments, Inc.


