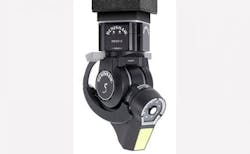
Probe Increases Multi-Sensor Capability
Designed for use with the REVO 5-axis measurement system on coordinate measuring machines (CMMs), the RFP fringe probe increases the multi-sensor capability of the REVO system by adding non-contact structured light inspection to the existing product range. All REVO system probes can be changed automatically and include tactile scanning, touch-trigger, surface finish, non-contact structured light, and vision probes. They are all used within a common coordinate reference frame, providing the choice of an optimum tool to measure multiple features all on a single CMM platform.
The RFP projects a fringe pattern onto the part surface and the probe’s camera captures the variation in fringe pattern to build a point cloud of 3D surface data. The data cloud is then evaluated by the 3D metrology software to deliver the inspection results. Non-contact structured light inspection with the RFP delivers clear advantages over traditional tactile probing techniques for freeform surfaces and complex geometry, such as additively manufactured parts, aerospace blades and blisks, automotive cylinder head combustion chambers, and delicate surfaces not suited to tactile measurement.
Unlike other non-contact structured light systems, the RFP fringe probe does not require reference markers to stitch together data from different areas, as this is done automatically by the REVO system. Coating the part in a matt substance is also unnecessary thanks to the automatic exposure compensation of different surface colors, textures, and reflectivity, ensuring optimal data results.
Two software tools provide easy-to-use inspection planning and digitizing. The RFP inspection planner is a tool for path planning and generating DMIS part programs from CAD, while the RFP digitizer app guides users around parts without models, collecting data as part of a reverse engineering process.
The RFP probe is automatically and repeatably interchangeable with all other probe options available for the REVO system, so the data from each sensor shares a common datum reference. This flexibility means that the optimum tool can be selected to inspect a wide range of features, all on one CMM platform, which is managed by an I++ DME compliant interface and Renishaw's MODUS metrology software.
