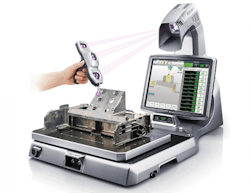
Handheld CMM: XM Series
The XM Series is an easy-to-use CMM that requires no CNC programming. With minimal training, anyone can quickly and accurately measure 3D/GD&T features and create detailed inspection reports.
The XM Series uses a new concept that uses a camera that captures near-infrared light emitted by seven markers to enable an accuracy of ±8 µm and repeatability of ±3 µm. Using the coordinate data from each marker, the machine is able to determine the position and orientation of the probe. As long as the probe is within the camera's field of view, you can approach the measurement location from any angle. The camera detects only the near-infrared light emitted by the markers. As long as the probe is within the camera's field of view, its position and orientation can be detected.
The XM Series overlays the 3D image with a probe camera image to simultaneously display the measurement information right on a live image of the part. Even users with no previous coordinate measuring machine experience can intuitively understand what is being measured. Anyone can measure the features the same way it was originally measured. Simply place the probe against the location displayed on the composite image. The XM Series reduces subjectivity by automatically detecting if measurements were taken correctly.
The XM Series comes standard with a function for creating inspection reports that include camera images. The measurement locations and measurements are automatically formatted, greatly reducing the time required to create inspection reports.
Coordinate measuring machine interfaces are often a mess of complex and unfamiliar commands. The XM Series, however, uses images, icons, and animations to help anyone easily understand how to operate the system.
