Effective immediately, Exact Metrology is proud to announce that they’ve become a distributor of the GOM CT scanner in the U.S. GOM is an established global company and leader in structured light scanning technologies. The company develops, produces and distributes software, machines, and systems for industrial and automated 3D coordinate measuring technology, 3D computed tomography, as well as 3D testing based on the latest research results and innovative technologies.
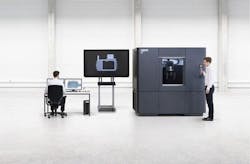
The computed tomography scanner, GOM CT, provides 3D data of internal and external component geometries in exceptionally high resolution. The GOM CT produces the finest details visible throughout the component, simplifying initial sampling, tool correction, and inspection tasks during production. It captures complex components including the "inner workings" in a single scanning process so that the user receives a complete image of the test specimen for form and position analysis or nominal/actual comparisons. The system shows its greatest strengths when digitizing smaller plastic and light metal parts.
To achieve a very high level of detail during component digitization, the components of the GOM CT were perfectly matched to each other: A high-contrast 3k X-ray detector generates a very fine pixel grid (3,008 x 2,512 pixels) and thus lays the foundation for high-precision detection of the measured components. 5-axis kinematics with integrated centering table makes it easier for the user to position the component optimally in the measuring volume so that the measurement is always performed with the best possible resolution. An additional plus: Within the measuring volume (diameter: 240 mm, height: 400 mm) several objects can be measured simultaneously in one scan, further reducing processing times. Thanks to the proven GOM technology the GOM CT ensures high precision and repeatable measurement results.
As with all GOM metrology systems, the control of the device, data acquisition, and evaluation are combined in a single software package. This means that no further software is required; the chain from recording the raw data to creating the measurement report is greatly simplified.
- 225 kV X-ray source
- 3k-detector (3,008 x 2,512 pixels)
- Voxel size: 2 to 80 µm
- Photogrammetric calibration
- 5-axis kinematics
- Measuring area: Ø 240 mm, H. 400 mm
- Temperature balancing
- I/O port


