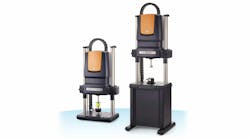
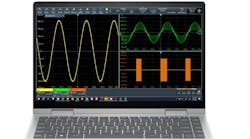
The PHAsis.one manual testing device was developed for precise testing of resistance-welded spots. It's ideally suited for the inspection of 2 or 3-layer joints with a single sheet thickness of 0.7 to 5.0 mm. 121 ultrasonic elements in an 11 x 11 matrix grant for a physical resolution more precise than 0.35 mm for the inspection of the nugget diameter. The imaging display guarantees a reliable evaluation of the test results. The generated cross section of the spot weld with colored depth imaging of the welded areas shows defects such as pores or a nugget that is too small.
In the Free Testing mode, spot welds can be tested according to the motto “Quickly check the spot welds of component XY”. In contrast to the inspection according to a test plan, all ultrasonic and evaluation parameters are freely adjustable. The test personnel can either freely set all parameters – which requires ultrasonic inspection know-how – or access stored data sets; in this case the user only has to select the material and the material thickness in the device menu. The latter is done when frequently identical materials have to be tested in order to avoid having to readjust each time. If not known, the individual sheet thickness can be determined directly with the wall thickness measuring function of the system.
To prepare a test plan, all spots welds of a component are often tested manually in an optimized sequence. The Free Testing mode is an ideal tool for this, because all data, sequences and results can be saved and transferred to a new test plan.
With the PHAsis.manager software, a test plan for a subsequent serial testing can be created on the PC based on the data obtained. This inspection plan is then synchronized to the relevant inspection systems and used by test personnel who require much less ultrasonic know-how. The user-friendly PHAsis.device test and evaluation software optically supports the user in the ideal alignment of the probe and thus contributes to measuring reliability.
PHAsis.one provides the user with information about the nugget diameter and detects the residual wall thickness of the welded area. The sound attenuation through structural transformation is also provided as a possible evaluation criterion for a zinc adhesion bonding.
- Imaging display (D-scan),
- More than 700 measurment points per spot weld in a measuring grid,
- Probe wih 20 MHz and 121 elements in an 11 x 11 matrix,
- Test area 9 x 9 mm2,
- Short testing time of a few seconds per spot, approx. 500 - 800 spots per shift and device
- Extremely user friendly inspection and evaluation software with minimal training
- Safe evaluation due to the imaging display of the inspection results
- Automated creation of an evaluation proposal for the spot weld quality
- Battery operated inspection device with low weight of 3.5 kg only


