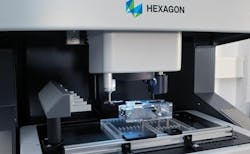
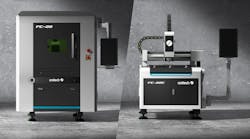
The Optiv Performance 322 coordinate measuring machine (CMM) is a customizable benchtop CMM with a small footprint and convenient upgradability which caters to a variety of applications.
Weighing under 400 lb., the fixed bridge and moving table-type machine is light enough to be placed directly on existing workbenches and relocated without recalibration by a Hexagon engineer. In addition to saving floorspace, the machine allows for increased accuracy and repeatability at high speed (300 mm/s) and high acceleration due to the stiffness of its granite construction. The CMM features advanced temperature compensation technology that calculates a correction value for measurement deviations to ensure users get consistently stable results. The Optiv Performance 322 is ideal for the inspection of sheet metal stampings, injection-molded plastic parts, profile scanning, and more applications.
Equipped with PC-DMIS software, the benchtop CMM is designed for flexibility and can measure a range of different parts with minimal turnaround times. The CMM is available in an entry-level vision-only configuration. However, the future-ready machine’s 3D accuracy specification and pre-cabling enables easy in-field upgrades to a complete 3D multisensor solution supporting a range of contact and non-contact sensors, reducing customer requirements for multiple products in the inspection area. The system is built on a modular concept, so the sensors, controllers, PC and measuring software can easily be customized and scaled to changing requirements.
- High throughput
- Supports series production measurements on large numbers of workpieces
- Optimum access from all sides for automation integration
- Variety of sensors permits exact tailoring to the measuring task
- Variable illumination, with a multi-segment LED ring light (lateral top light) for high contrast illumination of complex surfaces and edges
- Powerful image processing with video filters for image optimisation in difficult optical conditions
- PC-DMIS measuring software: Ease of operation thanks to automatic PC-DMIS routines, for example for part alignment or sensor calibration
- Options: Mechanical bearing CNC rotary table, vibration damping system, air-conditioned machine enclosure
Optiv Performance 322
- Benchtop model with torsion-resistant granite construction, a fixed bridge and a moving measuring table
- 300 x 200 x 200 mm XYZ measuring range
- Vision sensor with monochrome or colour camera
- Motorised CNC zoom (6x or 10x available) or Optiv Dual Camera optics
- Top, back, and ring light LED system
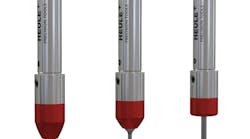
- Upgradable to full multisensor machine, with touch-trigger probe HP-TM,
scanning probe HP-S-X1C and chromatic white light sensor (CWS) capabilities - Optional rotary indexing table
- PC-DMIS measuring software
