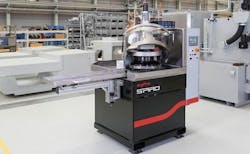
Spiro F5, F7, and F12 provide customized solutions for the “batch mode” processing of a wide range of parts.
From aluminum to steel, soft plastics to hard ceramics: No matter the material, the Spiro series can achieve highly precise plane parallelism (? 1.0 µm) for precision bearings, pump gears, and valve plates — to name but a few of the part types that can be processed. And because parts can be machined up to 20 times faster than lapping and with more precision than double-disk grinding, costs per unit are reduced substantially. Depending on the part’s material, dimensions, starting surface finish, and removal requirements, a single Spiro can fine-grind several thousand parts per hour.
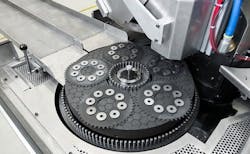
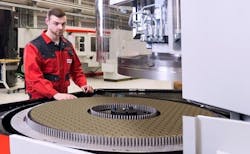
For plane-parallel fine grinding on both sides, parts are loosely placed in carriers that have teeth on the outside diameter. An inner pin ring rotates the carriers as they shift on a stationary outer pin ring in an orbiting manner. Machining takes place between two rotating grinding wheels (lower and upper). The optimal machining force is applied by the upper wheel.
The smaller F5 can process parts with diameters of 4 to 150 mm and thicknesses of 0.3 to 50 mm, while the larger F12 can accommodate parts with diameters of 6 to 420 mm and thicknesses of 1 to 100 mm. (The midsize F7 is suitable for parts with diameters and thicknesses of 5 to 220 mm and 0.6 to 80 mm, respectively.)
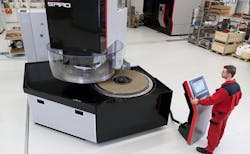
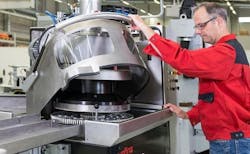
Because the Spiro eliminates water from the cooling process, there’s no chance of contamination — thus drastically cutting costs (the coolant is also recycled). The machines’ sturdy base keeps vibration to a minimum, greatly reducing tool wear, while their modular, ergonomic design allows quick tooling changes and easy accessibility. For example, the upper part of the machine swivels completely out of the work area, allowing fast loading and unloading of parts as well as easy maintenance.
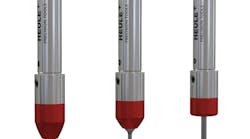
A high-precision, indirect measuring system (probe and anvil) guarantees optimal process results that can be duplicated from batch to batch, thus increasing yield. That’s because such factors as coolant temperature and abrasive contamination do not affect the measuring system.
F5:
- Disk diameter: 445/475 mm
- Ring width: 120/150?mm
- Maximum pressure: 400 daN
- Workpiece diameter: 4 - 150 mm
- Workpiece thickness: 0,3 - 50 mm
Features:
- 100-program storage
- Integrated sharpening programs
- Up to seven process cycles
- Optional loading table
F7:
- Disk diameter: 720 mm
- Ring width: 200 mm
- Maximum pressure: 1800 daN
- Workpiece diameter: 5 - 220 mm
- Workpiece thickness: 0,6 - 80 mm
Features:
- High drive performance
- Maximum flexibility for many applications
- Individually customizable for optimal machining results
- Reduced tool wear thanks to the low-vibration machine stand and guard
- High-precision, noncontact measurement control
- Visual process control for consistently high precision
- User-friendly and intuitive operation
- Great accessibility
F12:
- Disk diameter: 1160 mm
- Ring width: 341 mm
- Maximum pressure: 3000 daN
- Workpiece diameter: 6 - 420 mm
- Workpiece thickness: 1 - 100 mm
Features:
- Energy-efficient, low-maintenance drive concept (Torque)
- Very good accessibility
- User-friendly, thanks to visual-process control
- Flexible connection to different loading systems
