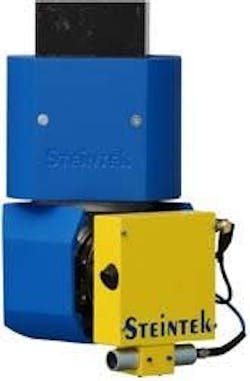
MAXOS - The World's Fastest CMM
NVision is excited to introduce MAXOS, the multi-axis optical CMM, to the North American market. Existing clients maintain that it is the fastest CMM in the world. “The MAXOS provides a significantly faster way to measure high-value precision components in an automatic production environment, "said Steve Kersen, President of NVision. "Our customers in North America now have access to a technology that until recently was only available in Europe and Asia."
In production measurement benchmarks the MAXOS has proven itself to have the output of four to six of the fastest conventional touch probe CMM machines and on challenging applications such as the full inspection of machined aerospace blisks at Centrax Plc in the UK, inspection times have been cut by 97%. The keys to the performance advantage are to be found in two places; the optical, non-contact probe and the multi-axis operation.
The MAXOS has its own proprietary patented non-contact probe. It is a point of white light that allows the collection of individual points at a rate of 70 per second. Like a touch probe CMM it collects individual points but unlike a conventional CMM it continues on its path at high speed and without pausing.
Non-contact scanners are not new but the difference between the patented MAXOS sensor and others is that it can scan freshly machined surfaces, highly polished surfaces and even mirrors without any need for them to be sprayed with a coating. It is this need for spraying that has been the Achilles heel of every optical scanner before it when challenged with scanning highly polished surfaces such as turbine blades and in clean environments such as those for aerospace and medical applications.
The MAXOS utilizes the conventional 3 axes of a CMM with two additional axes on its sensor along with 2 optional turntables resulting in up to 7 axes in total. All of these axes can be controlled to ensure smooth and fast movement around all of the points to be measured even on difficult to measure horizontal geometry and blade platforms.
Because the MAXOS measures with a single white light point, the entire cause of inaccuracy and approximation inherent in 3D measurement with a ball probe is eliminated. Consequently, the MAXOS has an exceptionally high accuracy of +/- 2 on matt surfaces and +/- 10 m on polished metal. It can achieve a point spacing resolution of 0.2 ?m without pausing. Additionally, since it has no ball probe and measures a single point at a time it is not limited by ball-offset geometry and can inspect radii of less than 0.2mm; key to the measurement of leading and trailing edges on turbine blades.
The MAXOS will create its own alignment for the measurement of a part based on an alignment file after which it will typically measure cross-sections and features against pre-determined geometry. Consistent with a production environment MAXOS will provide a complete inspection report at the end of its measuring routine without delay, enabling instant feedback for process control.
According to Giles Gaskell, Director of Business Development at NVision, Customers typically see productivity improvements well in excess of 400% compared with the fastest touch probe CMM. Anyone needing to improve throughput in their inspection process needs to take a look at what the MAXOS has to offer before they buy another CMM.”
- High Accuracy: Overall accuracy of 10 microns even on shiny materials. No need for spraying.
- High-Resolution: Resolution down to 2 microns. Can inspect leading and trailing edge radii of less than 0.2 mm.
- Fast Fast feedback for in-line inspection - Automatic inspection report in minutes.
- Automatic Simple automatic operation for the shop floor. No requirement for skilled operators.
