Mikrotron Cameras Help Create Alternative Method to Monitoring Additive Manufacturing
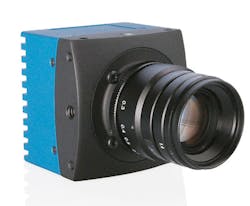
Metal parts manufactured using Laser Powder Bed Fusion or "L-PBF" are frequently installed in highly demanding and precise machinery, such as aircraft and medical instruments. L-PBF allows for the production of very complex geometries directly from a CAD model. Yet due to the nature of the layer-based process, defects such as porosity can manifest themselves throughout the entire volume of the produced component. To meet stringent safety and certification requirements, researchers at Flanders Make, a manufacturing science center in Lommel, Belgium, deployed the Mikrotron EoSens 3CL three-megapixel camera to gain a better understanding of melt-pool behavior and stability during processing.
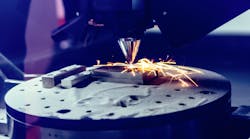
L-PBF is a form of additive manufacturing that uses a laser to melt and fuse metal powder together to create functional parts. Metal powder is spread over layers, typically in thicknesses of 0.1 mm, on a build platform until the desired dimensions are achieved. Essentially, L-PBF is the combination of many individually stacked weld lines, with the overlap and penetration depth determining final part density and quality. Any occurrence of defects can lead to unwanted variations in mechanical properties, reducing the part to scrap.
To detect problems, time and cost-ineffective post-production quality control techniques such as X-ray Computed Tomography are necessary to guarantee that the final component meets the required specification. Researchers at Flanders Make sought to create a feasible, economical alternative to these costly methods to estimate the melt-pool depth and width.
The main components of the Flanders Make imaging system are the Mikrotron camera and a large area silicon photodiode sensor. Sensors are band-pass filtered in a range of 800 to 950 nm to prevent any stray ambient and laser light from interfering with measurements. This system is built up using a custom FPGA-based frame grabber linked to a fiber-coupled Network-Attached Storage. The NAS is equipped with a RAID 0 array of four 1TB Solid State Disks resulting in a sustainable data rate up to 1 GB/s and a total capacity of 4TB.
The Mikrotron EoSens 3CL camera interface is a “full” configuration Camera Link and is capable of data rates up to 850 MB/s. Balancing the availability of light, resolution, and frame rate, the acquisition speed for the camera was set at 20,000 frames-per-second by the researchers. Captured images are 8-bit gray-scale images, measuring 120 x 120 pixels in size. The calibrated pixel size is 11.8 μm, resulting in a field of view of 1,416 x 1,416 μm. As a frame can contain more than one object due to the occurrence of spatter or break-up of the melt-pool tail, the first step in image processing was to filter out the melt-pool outline. This is done using a combination of edge detection using a Sobel filter, and the relative location of the laser in the frame.
In system testing, researchers found that the measured melt-pool width and predicted depth corresponded well with metallographic measurements over a very wide range of processing parameters. This ability to determine the melt-pool dimensions without the need for destructive testing is of great use, for instance, in the fast determination of a suitable processing parameter window. The time required to process all the data and generate process maps were less than five minutes on a desktop computer equipped with an NVIDIA QUADRO M4000. Of these five minutes, about two minutes were spent on image processing, which amounts to an average of about 0.5 ms per frame. Processing times are negligible compared to the time-consuming approach for generating processing maps using standard techniques. Those techniques usually involve the manufacturing of many samples with different processing parameters, after which those samples are removed from the baseplate, cross-sectioned, polished, and then etched for microstructural analysis.
The Flanders Make system provides a solution to the challenging task of meeting stringent quality and repeatability standards typical for high-end industries using L-PBF produced parts. With further refinement researchers believe that their methodology can be applied to other additive and more general materials processing techniques, such as electron beam, as well as laser and electron beam welding/cutting.


