Soft foot may sound like human foot disorder, but it is one of the most significant and most overlooked machinery alignment problems. Many experts estimate two-thirds of all rotating equipment in our production plants have this issue, yet it often goes undetected.
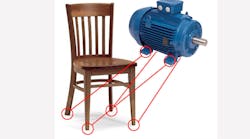
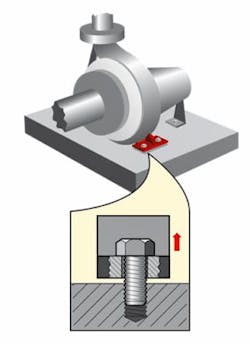
For those new to the problem, soft foot is machine-frame distortion. It happens when rotating machinery is positioned on its base, soleplate, or frame, and one or more of the "feet" fails to meet with the "foot points" on the frame adequately. A simple way of demonstrating the condition is to imagine a four-legged wooden chair and consider what would happen if one of the chair legs was shorter than the others. The chair would rock.
Same with machines; they're set off-kilter by this distortion and will "rock" if each of the foot points on the base does not sit evenly. This ailment impacts their condition, performance, and long-term health. To correct the situation and achieve precise alignment, you must adjust all of the foot points and the entire machine frame.
Accurately identifying the reasons for soft foot in a machine and correcting it before attempting an alignment will save you time, money, energy, and potential disruption of production.
Step 1 – Learn to identify the causes, types, and effects of soft foot.
The ability to recognize the various causes, types, and effects of soft foot is a critical first step. With this knowledge, the technician is better equipped for the second step, which is to diagnose and correct the condition using specific tools.
What causes soft foot?
- Badly machined base or feet
- Warped base plate or frame
- Debris, dirt or paint under feet
- A cracked, damaged foundation
- Too many shims
- Damaged or bent feet
- Pipe strain
- Grout decay
Types of soft foot
Several categories of soft foot have been identified over the years: squishy foot, parallel soft foot, angular soft foot, and external force soft foot. Here's a description of each type.
Squishy foot occurs when an overabundance of shims is applied to correct a soft foot problem. It also happens when a large amount of corrosion or debris builds up under the machine foot during an initial misalignment check. As the bolts are loosened during the repair, sediment and debris are released. This usually happens if the machine's bolts haven't been tightened for a long time—or if the machinery has never or rarely had the bolts loosened.
External force is a soft foot condition caused by electrical connections or severe misalignment in conjunction with stiff coupling stress-induced external forces such as pipe strain. This condition is sometimes hard to diagnose and can happen at any time during machine alignment.
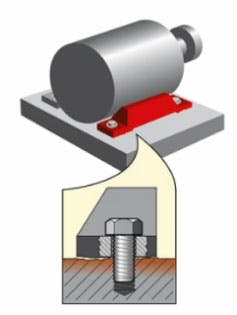
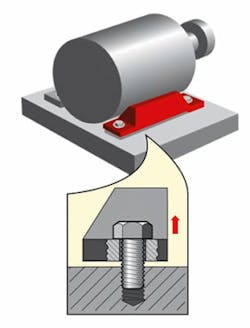
Parallel soft foot is the most common type of soft foot and is usually the easiest to spot. It occurs when a foot does not meet the base and produces a gap between the foot and the frame. When tightening the bolts, as the gap begins to close, the machine frame will start to warp to fit the baseplate, causing misalignment. Usually, the problem can be corrected by using shims unless you do not use the right thickness, or you use too many.
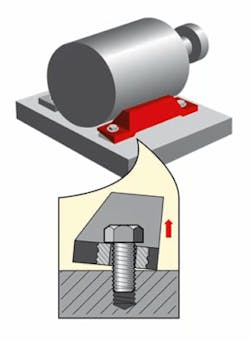
Angular soft foot occurs when a machine foot touches the base on either the side or outside of the foot. The other side of the foot is bent away, creating an angle between the base and the bottom of the foot. Angular soft foot is harder to diagnose because it takes place at an angle.
What are the effects of soft foot?
- Machine misalignment
- Distortion
- Bent shaft
- Increased load on bearings
- Misalignment of bearings
- Seal failure
- High vibration levels
- Increase in power consumption
Any of these situations can destroy machinery if not checked.
Step 2 – How to diagnose and correct soft foot and the tools to use.
Undoubtedly, correcting a soft foot problem can sometimes be exasperating, partly because the process often takes longer than the subsequent machinery alignment. However, if you can stay relaxed and think strategically, there is always a sizable reward—preventing machine destruction. Measuring soft foot can be done in several ways. Confirming you have the right tools available will make diagnosis more straightforward and quicker. It's vital to apply the procedures below during all machine alignments and installations to determine if a soft foot condition exists.
Here is a list of devices to help measure for soft foot, and tools to use to remove any debris found underneath and around the feet.
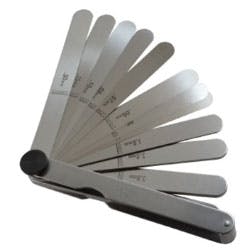
Feeler gauge: Use a feeler gauge to measure gap widths or the space between two parts. The device contains numerous steel blades with diverse thicknesses that can measure up to a quarter (¼) inch to as little as 1/1000 of an inch.Correcting soft foot with shims
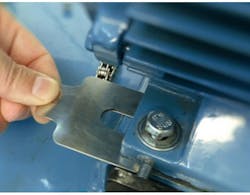
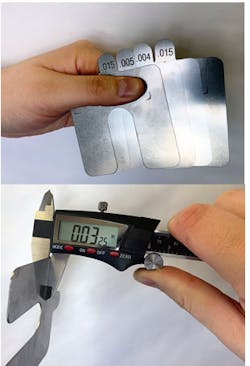
An effective way to correct machine foot issues is by using shims. However, if the frame or mount is cracked, twisted, or bent, or another overall machinery destruction has emerged, correcting the condition can be more complicated.
The machine will most likely already have shims. It's a good idea to clean any current ones and also clean the base plates and feet to eliminate any dirt and debris. It's essential to remove any corrosion, paint, or grime that might have collected elsewhere to avoid accidentally creating a new condition, squishy foot, during alignment.
How to avoid squishy foot
Here are five rules to apply to ensure better that squishy foot does not form while trying to eliminate an existing soft foot condition.
By following these soft foot mitigation best practices, including applying the right methods and tools to diagnose and correct the condition accurately, your chances of resolving the problem and restoring machine health are much higher. Always remember to check for soft foot before aligning shafts.
Ryan Best is an Application Engineer at PRUFTECHNIK, Inc., based in Philadelphia. Previously, he was a Service Engineer for PRUFTECHNIK, where he performed and sold field machinery services. He also conducted training for both employees and customers throughout North America and the Caribbean. His industry certifications include Vibration Analyst, Category II (ISO 18436.2).


